

Whilst I was looking for suitable bloggers for this festival I came some great blogs and wondered how I hadn't found them earlier. Katie blogs with her sister at Duo Fiberworks and it is chockablock of loveliness. I was thrilled when Katie agree to do a post on carving veg...
Hi, I'm Katie, I live in a small town in Kentucky and homeschool my two boys. I like to do a little bit of everything and am currently exploring woodcarving, felting knits and sandal making on my blog. I am also a designer of knitting patterns and sell patterns for knitted and felted toys on my blog, Duo Fiberworks.
Carving chunky shapes and adding a wash of watercolor paint is a satisfying way to transform wood scraps into lovely toys. I have been doing a series of tutorials on my blog for play fruit and vegetables. If you have a sharp knife and some patience, you can make these sweet radishes.
Carve play food radishes from wood

Tools of the trade

Supplies:
-twigs- about ¾ to 1" in diameter- I used maple. Any green (freshly cut) wood will probably work. You could also use a pine dowel if you don't have access to green wood.
-white string/thread
-green felt or felted wool sweater
-watercolor paints – red and white
-glue
-beeswax or polish
-white string/thread
-green felt or felted wool sweater
-watercolor paints – red and white
-glue
-beeswax or polish
Tools:
-knife (see here for more on knives)
-clippers/saw
-drill, tiny drill bit, 1/8" drill bit
-scissors
-knitting needle or other sharp thing
1. Find some images of radishes that you like. I used a favorite seed catalog.

2. Begin by removing the bark from the twigs.

3. Round the end of the twig by making cuts around the end. I slightly tapered the whole piece as well.
4. To round the other end, figure how long you'd like your radish to be and score a line there with your knife. Make small cuts into the piece, working around. Then repeat, coming from the other direction to make a "v" shaped channel around the piece.

5. Cut the radish free from the twig.

6. Remove the remaining end grain by carefully scraping your knife across the top of the radish.

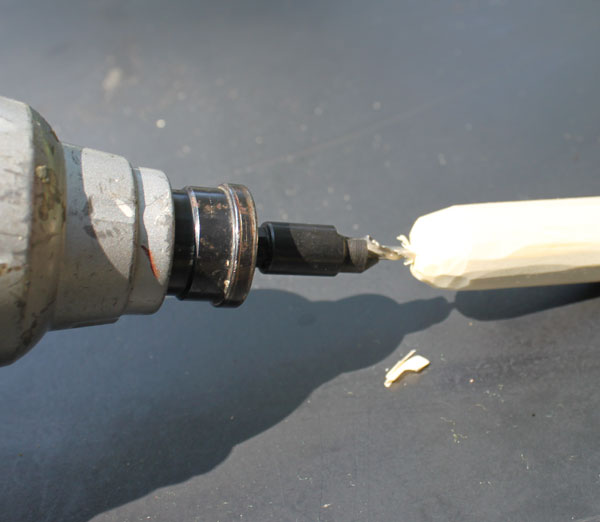
7. Drill a tiny hole in one end of the piece and a larger hole in the top of the piece.
8. Paint the radish. Start with the white and do a wash on the lower ¼” of the radish. Then add the red, allowing the colors to blend together. I apply the paint with not much water. Remember it will dry lighter.

9. Cut some threads and add glue to the tiny hole on the white end. Use the knitting needle to stick the threads in the hole.

10. Cut some leaf shapes from the felt or felted wool sweater.

11. Put glue on the ends of the leaves and stick them in the hole on the top of the radish.

12. Add some beeswax or polish.
Your radishes are done!

I have lots more tutorials for how to carve play fruits and vegetables on my blog. Visit my shop for beautiful handmade children's toys and more.
These are really cool!
ReplyDelete