International book giving day is coming soon, over on the official site there are some great book plates and book marks, pop over and download until your hearts content, just click the image...
First off I want to say a great big THANK YOU to everyone who filled in my questionnaire, it has really helped me see what I was missing and raised some great topics to tackle plus reassured me that I was on the right track with most of it.
I'm taking a business course at the moment, I'm the second week in, there is a tonne of homework which I'm really enjoying but it doesn't leave much time for anything else! Today I will be working on the new website and working through the next step in this weeks module and I will also be doing some tinkering over here again (I hope not too many people noticed that I crashed the whole blog last week!)
Anyway, I thought it would be nice to give you a little thank you for your help, so I rustled up a printable for you. It can be used in two ways - I love multi-functional things, don't you? So, you can fold it to make a mini colouring book - handy to keep in your bag with a pack of mini crayons for those 'I'm bored moments'
OR
You can colour them in then cut them out to make little play characters. There are instructions for both in the PDF below. (If need to click through to the blog to print it)
If you like it, please share it with your friends, especially those on social media, your twitter followers and Facebook pals and if you come up with a different way to use the file, let me know!
I would like to thank everyone for their input and comments about the mini blog series. I decided to bundle all the posts together to make it into an ebook. I have used a new service which means you can read the book on your iPad, kindle, computer - anything really. You get 3 formats so that it is compatible with whatever you want to read it on.
For now, I have set the minimum price for $0, yep, you can get it for free so all you need to do is set the sliders on 0.
BUT, if you want to pay for the book, maybe you think that over the years I have given you so many great ideas that you would like to reward all my hard work, *wink* then you can move the sliders. The top slider shows how much you actually pay and the bottom one is how much I get from the sale.
Now, maybe you have suddenly come into a lot of money, then you can take the slider right to the end, neat hey? The other thing I should mention, is that with it being an ebook if and when I update it you automatically get sent the updated version, clever stuff.
It is the first time I have used this software, so I haven't got my head around all the formatting yet. If you do download the book, I would love to know what it looks like on your reader, so I know how to improve it. So, what are you still here for? go and click on the green button and grab yourself a copy!
When I joined the last culture swap I made a PDF file to go with it, of course, I got a bit carried away and what started out as a couple of pages ended up at 26 pages of information!
It includes pages about geography, food, traditions, housing, festivals, recipes, language, a quiz and fun facts plus a pile of 3 part cards that you can print out and laminate. The text is written as if Ebi-kun wrote it himself, so it sounds like it is coming from a 6 year old.
If you would like a copy, I have added it to the culture store, just pop over here!
Call me old fashioned, but I think it is important to send a proper thank you for gifts, I don't go as far as the Japanese thing of calculating a third of the original gifts cost then sending a present back worth the third but a card will do nicely.
Now, I didn't want to force Ebi-kun to sit and write a massive pile of cards, no fun and it will turn into resentment so I came up with a plan.... using some of his new Ninjago Lego and using the business card holder idea as a base we made a stand to hold blank cards.
Then we cut out a pile of cards and Ebi-kun wrote little thank you's on each one, we popped it into the holder and took a photo. Once we had worked through the pile I loaded them onto the computer and cropped them to size and printed them onto postcards.
I wrote the addresses on the back and Ebi-kun wrote a message or drew a picture on each one, pretty painless and a lot more fun!
If you don't want to go through the hassle of making each card I photographed a blank one so you could print this out and write a message on the blank area. This image is low resolution so I recommend printing it form the Flickr image HERE. I sized it for a standard Japanese postcard so the image is 140mm x 90mm but you could resize it if your local postcards are a different size.
Believe me, once you have tried home made Mozzarella you won't want to go back to store bought stuff, it is THAT good. It isn't quite as easy as the ricotta and I have had a couple of times where it hasn't turned out right but I think that was down to a, forgetting to sterilising everything and b, using tap water instead of bottled water. Now, sterilising... my method which has worked up to now is to put the tools in the saucepan, fill with water and bring to the boil for a couple of minutes and then pour the boiling water into the heatproof bowl. Probably not the best way to do it but it works for me!
When you add the cheese salt you can add herbs or anything else you fancy instead, it will keep for up to a week (not in this house!) and you can use the whey for boiling pasta, making bread, soup stock etc. The whey has all the good stuff in it so it is a shame to chuck it out.
The last important thing is that you MUST use pasteurised milk, if you don't your cheese making is doomed from the start.
I have done this one as a PDF, I could tell you that I was thinking of you as it is easier to have a printable recipe is it not? But the truth of the matter is that I am on a mission to learn and test drive new software and I wanted to see how like iwork before I buy it.
I love you all, so I would like to know whether you prefer tutorials to be printable, what do you think? Mozzarella Recipe
Yes, Ebi-kun has moved into the realm of ninjas, as if knights, dinosaurs and samurai were not enough. So, I thought I would combine his new found love with a little tutorial, this one is for all those novice fibre artists out there and for anyone who wants to whip up a quick gift or change their room a bit. Scatter cushions are great for that! All it needs is for you to sew one piece of fabric to another piece of fabric and then 3 pieces of fabric together - sounds easy enough doesn't it? If you use the formula below you can make a cover for any size cushion.
Requirements:
cushion form
fabric
black felt or fabric
black thread for applique
thread to match cushion fabric
bond-a-web or similar
Measure your cushion form and add 1.5cm for the seam allowance.
That will be size of your cushion front
Cut out the fabric.....
For the back you need 2 pieces of fabric, the height needs to be approximatley 2/3's of the height of the front piece plus 1cm for the hem, the width is the same as the front piece.
For example, my cushion form is 36cm x 36cm
My front piece therefore will be 37.5cm x 37.5cm
The back pieces will be
height of the front piece/3 x 2 then add 1cm for the hem.
37.5cm/3 x 2 which is 25cm + 1cm for the hem.
so I cut out
37.5cm x 37.5cm
37.5cm x 26cm (cut 2)
Applique the design....
Print out the ninja from the file at the bottom of this post.
Put your bond-a-web over the top of the ninja and trace around it.
Iron the bond-a-web onto the back of the black felt.
Cut out the ninja.
Peel off the backing paper and iron the ninja to the centre of the front piece of fabric.
Use an applique stitch if you have one or a small zig-zag and sew around the edge of the ninja, at some points you may need to turn the fabric, to do this lower the needle so that it is in the fabric, lift the presser foot and gently move the fabric round. Lower the presser foot and continue sewing.
Prepare the back pieces...
Fold over the long edge by 1cm and press.
Then turn it over another 1cm and press again so that the raw edges are hidden. Sew along the edge to make a hem.
Sew the cushion together....
Lay the front piece on the table, right side up.
Now lay one of the back pieces right side down on top of the front piece with the hemmed edge towards the centre and the outer edges aligned with the front piece.
Lay the second back piece, right side down with the hemmed edge towards the centre and and the bottom edges aligned. Pin to hold all the layers together.
Sew all the way around the edge with a 1cm seam allowance. It is preferable to use an overlock stitch but it will work fine with a straight stitch. If the fabric is prone to fraying then trim the edges with pinking shears. Trim the corners, by cutting the tip of the corner off.
Turn right side out and press. Put in your cushion form, stand back and admire your handwork.
If you are looking for more cushion and pillow inspiration, pop over to Sew Mama Sew, they are having a Pillow Month!
I think by now you know that I love the Montessori method, from when I first started reading about it, I thought to myself - it just makes sense! Now, I know that it isn't for everyone and not every child will flourish in a Montessori environment but on a whole I think Maria Montessori had her head screwed on the right way and we could all learn a lot from her.
One of the things that is hard about going down the Montessori path is that if you plan to do it all at home then it can be a very costly do indeed. Most Montessori equipment is expensive and it is really hard to decide which key pieces of equipment you are going to spend your well earned money on and which pieces you are going to try and make.
If you have a fully equipped workshop and know how to use all the equipment it probably isn't such a big deal to make a good chunk of the equipment but we don't all have that and budgets are tight so it often comes down to using alternative materials and depending on the piece of equipment you are making I think that is fine but often there is a good reason why a certain piece of material is made in a particular way.
Right, the constructive triangles - I thought these would be an easy thing to make, just a bunch of 12 right-angled scalene triangles right? wrong!
Attempt number one...I tried using 1cm thick foam but it was difficult to cut so the triangles were not very accurate and so they didn't fit together well. Plus they had a lot of static when working with them so they would move around a lot. Fail.
Attempt number two...Next I made a set out of thick card, these were cut better but not heavy enough so Ebi-kun got frustrated quickly because they would move about as he tried to place the pieces together and if there was a draft from somewhere the whole lot of work would shift. Fail.
Attempt three....and I found a winner! This time I used thin craft foam 2mm thick. It was much easier to cut and then (and this is the genius moment) I put them in the bathroom. You could work on a damp table but they work really well on the bath wall. The water keeps them stuck in place plus it has the added bonus of working different muscles, any work which involves a vertical surface is good for the child's muscle development - think of an easel or magnets on a fridge.
Now you are probably wondering what the green bits at the top are....
well, they are Yoda's feet, I am not sure what Maria Montessori would have made of Yoda.
I have made up a template for the blue triangles that you can print out below, you will need to make 12 triangles. I need to get some more foam so that I can make the rest of the constructive triangles now.
Growing up, the button box was always one of my favourite 'toys' and I would spend hours playing with it. Ebi-kun also does the same, he will sort them into colours or shapes, polish them, find ones with magical powers, making patterns in playdoh, flicking them around the floor in his own version of tiddly winks and other such things. Recently he has got a thing for treasure hunts, so I made up this button hunt to keep him out of mischief, I have made it into a PDF so you can download it and do the same. You could easily make a simpler version for non readers or one specific for buttons in your own tin.
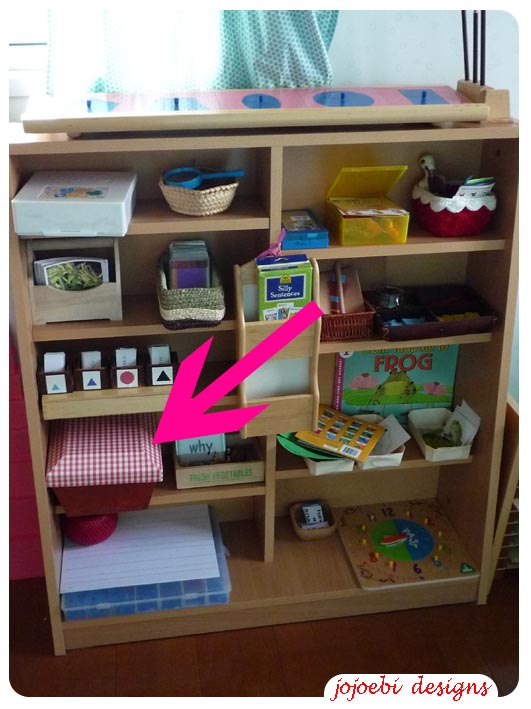
We have been working with the grammar farm recently, I briefly mentioned it when I showed you the re-arranged room, it is just there on the shelf.
It was quite fun to make, I started with a large piece of green felt and added a blue patch for a pond and some brown for the ploughed field. For the silo I painted a toilet roll middle and a card cone silver and the barn was a gift box that I picked up in the ¥100 shop. I decided to leave the lid and just painted the barn brown and cut out a door so the animals can go in and out. The best thing is it all packs into the box.
My favourite bit is the scarecrow which is made from a pipe cleaner and dressed in felt clothes and a big wooden bead for his head. I stuck him onto a magnet and stuck another magnet into the ploughed field. I thought Ebi-kun would have plenty of farm animals in his animals box but when we went through them they were either way too big or wild animals so I ended up buying some wooden animals at the ¥100 shop.
We have got as far as adding the adjective, I do like this method of introducing grammar and Ebi-kun enjoyed making the sentences.
I have made a file with all the cards and grammar symbols plus how to present the lesson and it is available for download HERE.
With the world cup being on and you know how much my boy loves his footie, I thought it would be the perfect time to introduce Africa. Here are a few things we have done so far...
I cut out pieces of coloured card so that when they are layered they make the flag of South Africa, he got
out his flag book to compare the flags.
working on the Africa puzzle map
Now, a while ago I organised a couple of continent swaps and we got some great goodies back, (thanks you) this is one of the activities, there is an African village scene and then cut out of different people doing different jobs, it turned out to be a great conversation starter. He would ask me what the people were doing and why, one conversation went like this:
E-K: what is she doing?
Me: pounding grain to make flour
E-K: what about this woman?
Me: what do you think?
E-K: maybe making bread.
Me: yes, looks like it
E-K and him?
Me: putting the bread in the oven
E-K: why don't they use a bread machine like ours, it is much easier.
Me: good question, do you know how the bread machine works?
E-K: yes, you press the buttons
Me: so what makes it get hot to bake the bread
E-K: the buttons (looking at me as if I am daft)
Me: do you know what kind of energy the bread machine uses?
E-K: (big sigh, blimey my mom is slow) you put the flour and other things inside the machine and then press the BUTTONS and the BUTTONS make it hot and cook the bread and then it beeps when it is ready.
The conversation went on for quite a while and we talked about electricity and water supplies, all rather amusing.
He has also been using the 3 part flag cards, kids always seem to love maps, I know I did when I was a kid, maybe it the bright colours and simple designs that draws them to flags.
With the world cup fever on at the moment it is the perfect opportunity to introduce the continent of Africa. I have been busy making 3 part flag cards and flags for the continent puzzle maps, if you want to make some too, I have done the hard work for you, they are available here.
I have moved the Montessori PDF files that are for sale to my website, I have been having some problems with Lulu so they are HERE until I can get the new site up and running.
Due to current news topic of volcanoes, Ebi-kun asked if we could do the volcano experiment again and since it was a lovely sunny day we decided to do it outside.
We used some clay that we got from the yochien to build the volcano, it was built around a small plastic cup and decorated with a few trees and brave animals. Inside the cup I put in a couple of teaspoons of baking powder and some food colour then to make the eruption start Ebi-kun poured in some vinegar.
I am not sure my Auntie Jill and Uncle Colin would appreciate this since they are currently stuck in Hong Kong and...
My uncle Simon and his girlfriend are stuck in Spain (but I think they decided to head back overland) and then there is my cousin Steve who is stuck in Egypt on a rig until the next crew get there.... oh dear!
But in our corner of the world it was pure explosive fun and yes, we had to do it again and again until we ran out of vinegar!
I have also made up a PDF file with a set of volcano 3 part cards, the file has fully labelled cards, black and white cards for the kids to colour themselves, definition cards, volcano fact cards, a diagram to label and instructions on how to make the volcano, if you are interested you can get the file from here.
Lots of free resources, printables and activities available in the free resources library
I am always amazed at the little differences in the English language and have got used to switching in American English terms such as movie or garbage when I am talking to either North Americans or Japanese that have studied American English. It is just easier for the flow of the conversation rather than stopping to translate every 'English' expression. At home we use British English and I will never use the term fanny pack *blushing at the mere mention*. It is funny how some words I never had any idea about them having a different meaning, which brings me round to flapjacks. I was chatting to a Canadian friend the other day and apparently Canadian flapjacks are more like pancakes and the expression 'Ole Canadian Flapjack' has a whole different meaning which has little to do with cooking (at least I can say I have never tried that).
So, after talking about them I started to crave one, I haven't had a flapjack for years but used to make them often as a kid, yummmm
It is an easy recipe for the kids to join in with too, just take car with the hot ingredients in the pan. Lots of measuring, stirring, mixing and spooning practice. So, if you want to make some, I have made up a printable recipe card like The 5 Cup Cake card. You can download the flapjacks here and the 5 cup cake here. A quick tip, if you use a silicon pan you don't need to grease it but a regular tin you will and pop it in the fridge once it has cooled a little, once it is properly cold it is easier to cut.


 I am not sure my Auntie Jill and Uncle Colin would appreciate this since they are currently stuck in Hong Kong and...
 My uncle Simon and his girlfriend are stuck in Spain (but I think they decided to head back overland) and then there is my cousin Steve who is stuck in Egypt on a rig until the next crew get there.... oh dear!


 It is an easy recipe for the kids to join in with too, just take car with the hot ingredients in the pan.
 Lots of measuring, stirring, mixing and spooning practice.
 So, if you want to make some, I have made up a printable recipe card like The 5 Cup Cake card. You can download the flapjacks here and the 5 cup cake here. A quick tip, if you use a silicon pan you don't need to grease it but a regular tin you will and pop it in the fridge once it has cooled a little, once it is properly cold it is easier to cut.