Showing posts with label new skills festival. Show all posts

Saturday, 1 October 2011

New Skills Festival - Round Up

I would like to thank everyone who joined in with the new skills festival, I hope you all enjoyed it as much as I did and I hope you are inspired to try something new and let that inner crafter out to play. If you have tried any of the projects featured drop me a line with a picture or links to where you have shown it (blog/Flickr etc) and I will do a round up. I have really enjoyed connecting with some new friends and some old and I have found some fantastic new blogs to follow in the process. I have put links to all the projects so they are easy to find in the future and I will put this post in the Tutorials page, the tab is at the top of the blog.

  1. Stamp Making with Kristy
  2. Snow Dome Cards with Teri
  3. Fabric Headband with Chie
  4. Cute Bento Bag with Kat


  1. Bento Wrap with Zhing
  2. Patchwork Tote with Wynn
  3. Social Media with Elana
  4. Dream Boards with Jamie


  1. Soap Making with Rene
  2. Carving Wooden Veg with Katie
  3. Book Making with Susan
  4. Stamping with Christy

  1. Japanese Binding with me
  2. Etegami with Debbie
  3. Felt Ninja with Liz
  4. Fall Banner with Heather


  1. Record Tray Pedestal with Nikki
  2. Fabric Design with Monda
  3. Bag making tips with Emma
  4. Running Comps on your blog with Di

  1. Recycled Padded Envelopes with Lyndsey
  2. Product Photo Tips with Cathy


Friday, 30 September 2011

New Skills Festival - with Teri

Teri of Giddy Giddy is one of my newer bloggy finds but as soon as I clicked through to her blog I was hooked and spent a good chunk of time going through her archives. Today is a paper craft and a cute one to boot, I am thinking these would be great for special Christmas cards....

What are DIY Snow Globe Postcards, you ask? Mailable art that will "SNOW" when shaken or flipped over.

Globecard8

This one is an invitation for Grandma to visit us! How can she resist this?

Globecard4

Kremlin in Winter.  The castle is a collage I created and the snow is iridescent plastic left over from a previous project  (the pink arrow thingie is the universal symbol for "TO ACTIVATE SNOW, SHAKE ME, FLIP ME, TURN ME OVER").

THE TUTORIAL:

Globecard1
Globecard2

1. Supplies to gather:
- colorful card stock paper, transparent plastic film, scissors, glue or glue stick, tape or double stick tape, and your preference of fake snow (confetti, glitter, plastic snow, etc.) and xacto knife for adults only.
- Cut out an 8" x 6" piece of card stock that will be folded in half. Once folded, this size is a standard 4" x 6" postcard.
- On one side, cut out the dome shaped window with xacto knife. 
- Cut plastic film to be approximately 1/2 centimeter larger than the window itself. Tape down edges securely.
- Create or glue down snow globe backdrop as well as foreground image directly unto the opposite side of window.  Any medium would work as you can clearly see above. It can be a photograph, magazine picture, a child's drawing, collage, painting, etc!
- Place your choice of fake snow on top of artwork on in between the folds. (We used confetti, glitter, cut paper and plastic iridescent snow).  You will always need to put down more "Snow" than you think because some of the snow will tend to get stuck in the corners of the postcard so be generous here.
- Using glue or double sticky tape, fold and press down the two parts together. 
- You are done! They are ready to be mailed, but because they are heavier than the average postcard, they will require standard letter stamps as opposed to postcard stamps.
- I hope you love this project!
For more of my work please visit my blog and for cute children's clips and bags take a look in the shop.

Wednesday, 28 September 2011

New Skills Festival - designing fabric with Monda


I first stumbled across Monda's blog a long time ago when following a link for monster softies and ended up staying, it has been great watching her grow as it were and delve more seriously into the world of surface design, today Monda is going to take us through the process from sketch through to fabric printed at Spoonflower.

Creating a design for fabric by Monda 
In this post I'm going to walk you through a very basic version of the design process used in creating a simple surface pattern design, which can then be printed onto fabric.
Every design I create starts out as a pencil sketch in my sketch book. I usually have a idea in my head of what I want to create, but having reference material is also crucial to the process.


The design above is based on a drawing of a dried poppy seed head which I collected from my garden. I also cross referenced this with images of poppy seed heads which I found on the internet.


Once I have enough sketches, I then pick the ones that I think might work well in a pattern and I draw them digitally in illustrator.


At this stage, I also chose the colours for my designs. Once I'm happy with my digital drawings I lay them out and duplicate them to form a pattern. There can be lots of moving around of different elements within the design at this stage, but that's the beauty of digital design - it really gives a lot of flexibility and scope for creating multiple design layouts, until you find one that works well for you. I've chosen to go for a simple linear design. It's important to think about spacing and how the design might look when it repeats. You'll see that this design is currently in a square format, so imagine what it would look like if you placed another identical design next to the original one.


Once the design is complete it is then ready to be printed onto a fabric. There are various printers out there who print onto fabrics but I can definitely recommend www.spoonflower.com Spoonflower is a US website which can be used by anyone who wants to create (and sell) their own designs on fabric - no minimum yardage is required, so you can order swatches, fat quarters or yards of your design onto various different fabrics. I've uploaded my fabric design to spoonflower so all I need to do now is buy a swatch and wait for delivery:


Spoonflower is not only great for printing your own designs. You can also purchase fabric by other designers too, and unlike many fabric shops and stores, you can choose the fabric you'd like to have the design printed onto. Quilting weight cotton, Jersey cotton, Canvas/Linen cotton, and Silk are just a few of the options available.
You can check out Monda's Spoonflower designs here (and mine are here) and she also has an Etsy shop selling all kinds of monstery goodness.

Monday, 26 September 2011

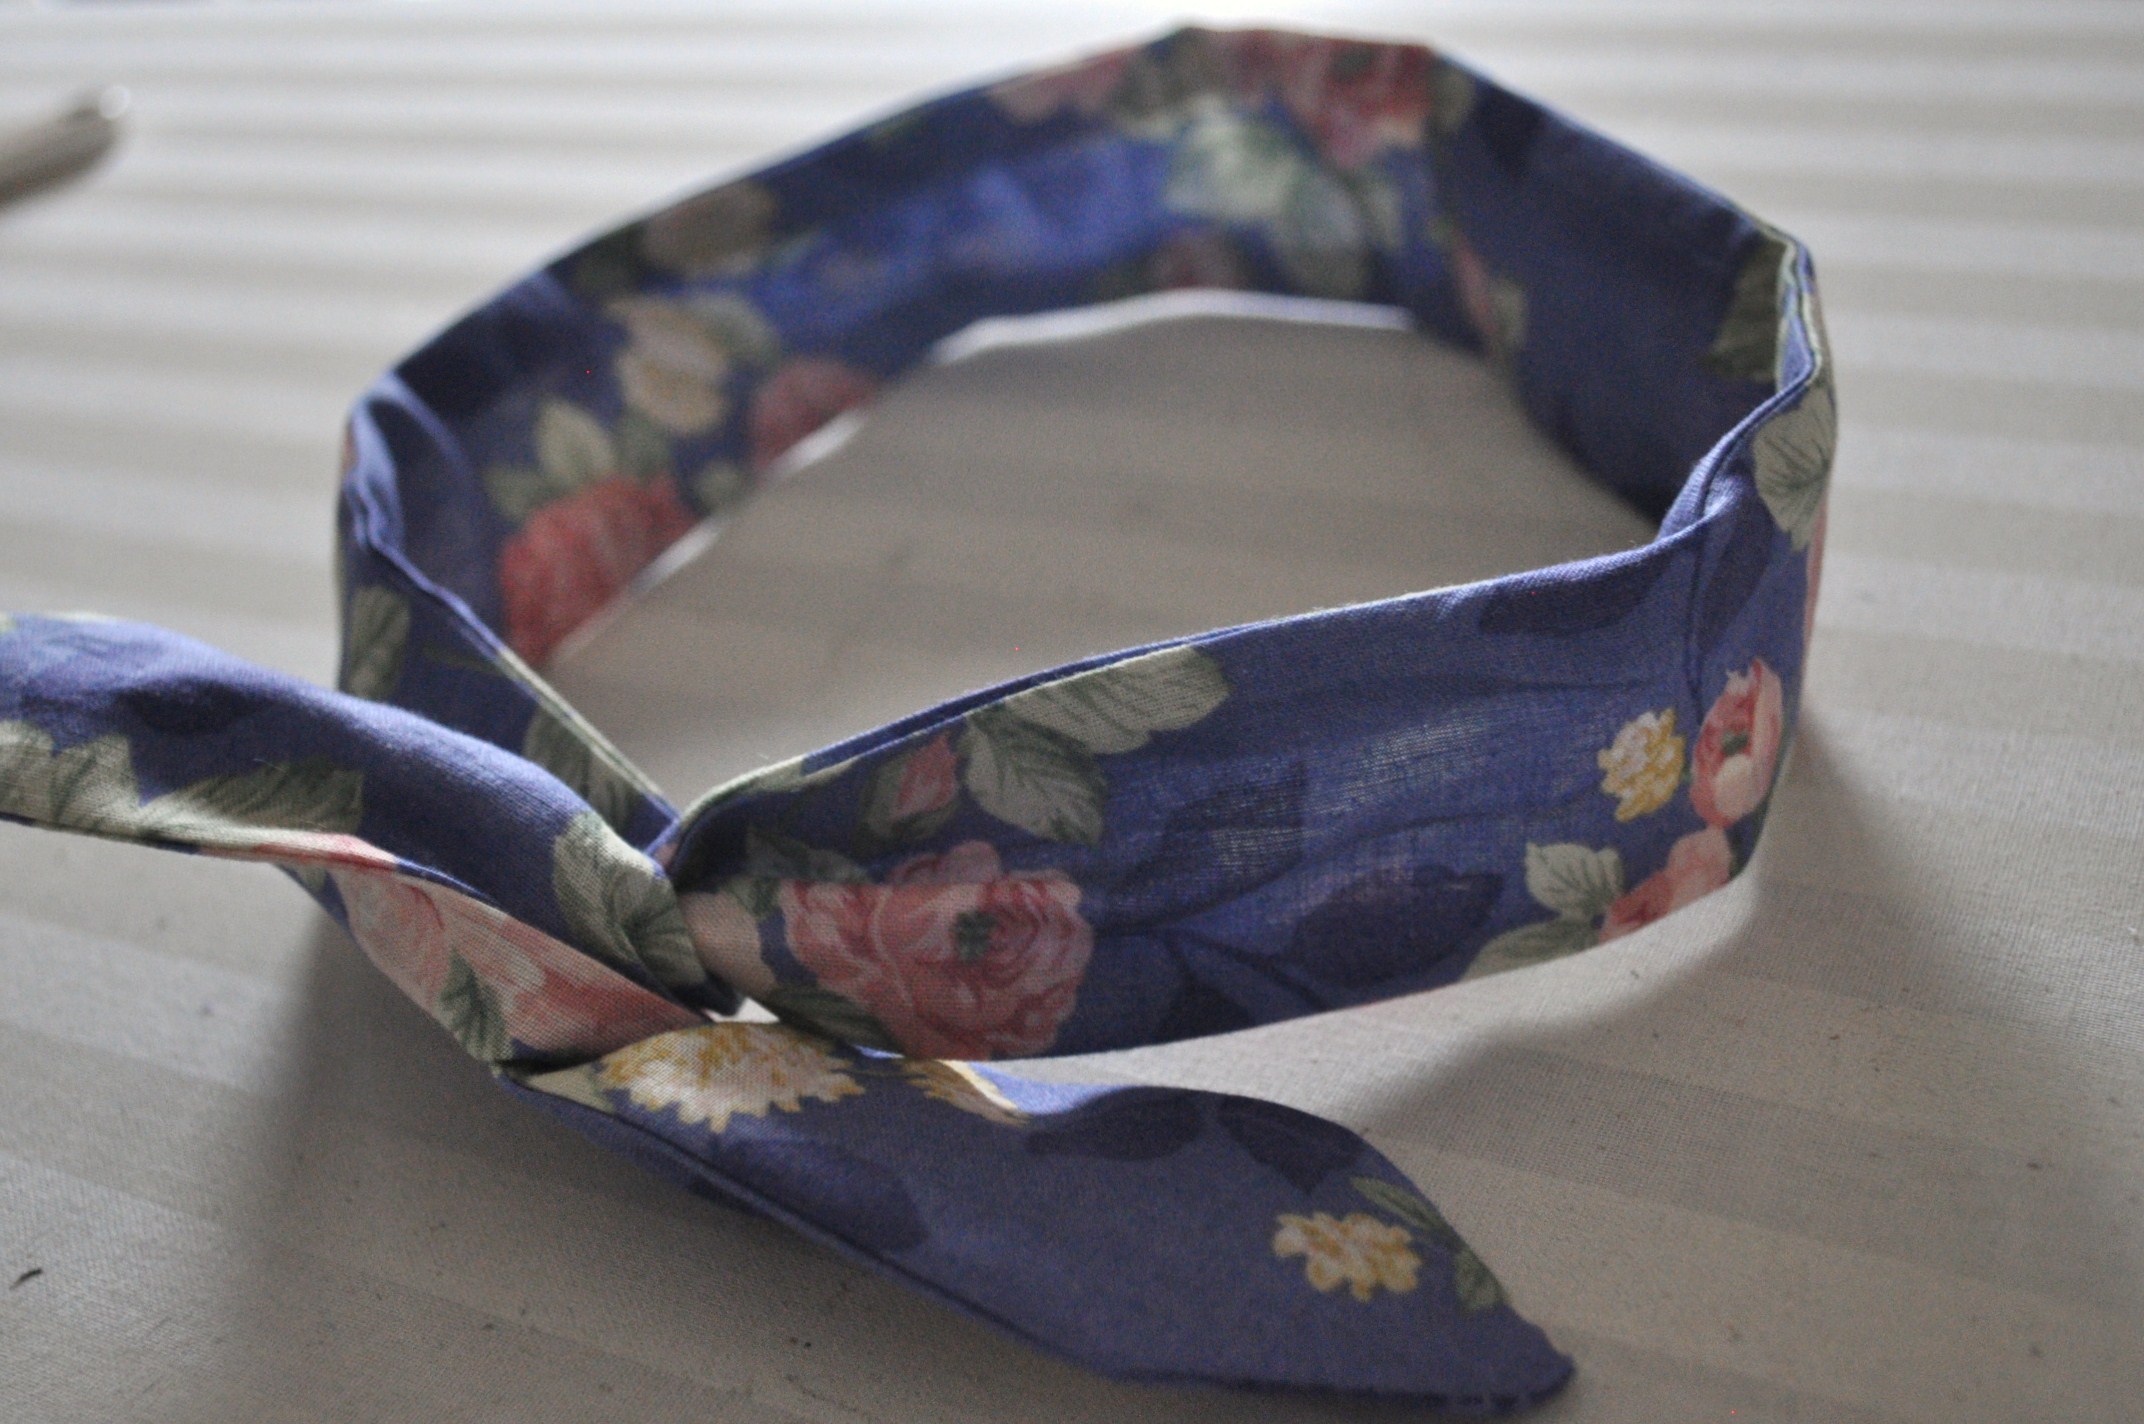
New Skills Festival - headband making with Chie

Today I want to introduce you to the delightful Chie from Vivat Veritas, I can't quite remember how we met but I do know I fell in love with her blog and she is sooo much better at making clothes than I am!

Hello! My name is Chie. I'm thrilled to be able to participate in Jo's new skills carnival!
I've been sewing since I was little, but it was not until 3 years ago that I really got into sewing clothes, especially woman's clothes. When my friend lent me a basic sewing machine and I made a pillow case. With a little practice the next thing I knew, I was selling my creations on etsy.

Sewing clothes creates a lot of left over fabric. Those leftover pieces are usually so small that they can't even be used to make a camisole or shorts. They are however, big enough that I don't want to throw them out. I serendipitously came to find that those scraps are the perfect size with which to make headbands. This headband is super easy to make, and a great way to reduce your left over fabric stash! Once you get used to it, it takes less than half an hour to make one. The headband has a wire inside, so it stays on your head, and you can twist the end however you like.


Here is a tutorial on how to make this headband:

I

hope you enjoy making the headband. Stop over at my blog to see my sewing journey and take a look at my etsy shop to find some really cute dresses :)
xo
Chie

Friday, 23 September 2011

New Skills Festival - Photography with Cathy


Cathy is one of my neighbours, well she lives in a neighbouring town! I met her not that long ago but instantly loved her enthusiasm and love of artistic expression. She takes some stunning pictures so pop over to her website and have a look around and those of you in Japan might spot her on TV as she has been doing some talento work too.


Hello Jojoebi fans!  
I'm Cathy, a Creative Commercial Photographer from Australia, currently living in Tokyo. Thanks so much to Jo for inviting me to guest post on her blog. I started blogging about a year ago, I hold a Bachelor of Photography and have experience working in various photographic fields. I recently made the move to Facebook and I love using my photos to visually communicate my life experiences. I admit my experience with crafts is limited to the occasional Martha Stewart tip of the week, getting inspired by blogs like A Bit of This & A Bit of That and checking out all things gorgeous on sites like Pinterest. *However* I still love to create things... I just use the camera instead of a needle + thread if you know what I mean. Now I know a lot of you out there are just as creative and like to take your own photos, maybe even for your own blogs/websites etc., so here are some tips for you: 
What You'll Need
- 1 camera (point and shoot, DSLR, a film camera or even a mobile phone, whichever tickles your fancy)
- 1+  objects you would like to photograph
- indoor or outdoor locations
- props, backgrounds where necessary

- 1 large dose of creativity 

1. A La Mother Nature 
As a professional photographer I'm not going to pretend that professional photographs aren't any good. When done well they are beautiful and can make a big difference to your creations but not everyone can afford to pay a pro. The good news for all of you DIYers is that you *can* take good photos without a studio and lots of expensive camera equipment. "How?" I hear you ask? Well, there is one secret ingredient - use what artists have used for 1000's if not 10's of 1000's of years.... nature! These photos were taken using nothing but a camera. No flashes, no reflectors, no tripods, no lighting needed whatsoever. The sun is a free + natural source of light and nature is the perfect backdrop for so many photographs. Not only is it free, it is right at your doorstep and with its ever-changing landscape nature offers a myriad of possibilities for photographs. What more can you ask for? 


2. Simple is Best 
What's more is that you don't even need to take a photography course or know all the technical mumbo jumbo to take a good photo. All you need is a camera (be it a DSLR, a point and shoot, a film camera or even a mobile phone). The photograph of this top was taken in my bedroom against the window using completely natural light. It helps to know a few camera basics but they only serve to enhance the photo. *You* control the camera and what you photograph so don't be afraid to experiment. And if you find yourself in all sorts of strange and contorted positions, or in your garden hanging from the limbs of trees, don't worry. That is what photography is all about! 


3. Use Your Imagination - Raid Your Cupboards 

Anyone who is good at crafts is pretty good, if not excellent, at using their imagination. So let it be free and think of all the different things you can use to make your photos special. And you don't have to go far - your home is full of them! Things to look out for are different colours, textures, tones + shapes. Over my summer holiday I  made some orange liqueur and had some leftover rock sugar which I used to shoot these earrings. I just love the stuff! Don't be afraid to venture outside as well. There are also lots of querky objects in and around your neighbourhood. 


I hope you've found these tips helpful and if I have inspired some of you to venture forth and try them out please have a great time of it. The only hard part is finding (or making) the time to take the photos. The rest is a whole lot of fun. 
Happy Creating!! 

xx Cathy 
  To keep up with Cathy's photography, visit:  her facebook page or go to her website.  

Thursday, 22 September 2011

New Skills Festival - Record Tray Pedestal with Nikki

I was a bit nervous about asking Nikki from WhiMSy love to join the festival, I have been reading her blog for what feels like forever and is a bit of a crafty rock star, I am so glad I did ask though as she came up with a super cute idea using records....


Hi there, crafters! This is Nikki, of the blog WhiMSy love. I'm the mommy to 2 super kidlets, the wife to a pastor, & we all reside in small-town Nebraska. I'm a crafter, blogger, newspaper columnist, jumper extraordinaire, & photographer. I'm so happy to be here, sharing a bit of my kooky love of all things handmade.
Today I'll be showing you how to make these Record Tray Pedestals. I've got oodles of records lying around & I'm always trying to come up with a nifty way to reuse or recycle them.
For this project you'll need large records, various glass/ceramic items such as candleholders, vases, bowls, etc. Basically, anything sturdy enough that can serve as a base to your tray---thus making it a pedestal.You can purchase records for very cheap at thrift stores AND find an assortment of glass/ceramic items to choose from in all shapes & sizes too! You'll also need E6000 glue & spray paint.


1.
The first thing you'll want to do is melt your record into a "tray" shape. Place a metal bowl, upside down, in your oven on the very lowest setting. (Mine goes down to 175 degrees.) Next, place your record right in the center of the bowl.


2.
Keep an eye on your record.
Once it starts to go limp, it's time to remove it from the oven!


3.
Have ready: oven mitts & a square dish.
I love my vintage pyrex!


4.
Now, remove the record with the oven mitts & place it inside the square dish. It's gonna be a bit hot, so use the mitts or some kind of cloth to press the record to the sides of the dish. (You can also make record bowls by shaping your heated record inside of a BOWL instead of a square DISH.) The cool thing is that if you HATE the way your record is shaping up, you can put it back in the oven until it gets all limp & try again.
Yay for do-overs!


5.
Once the record tray is cooled down, which should only take a few moments, it's time for painting!! I set my record trays up on big juice cans in the backyard & spray painted thin coats. The light pink paint took about 5 coats, the cream-colored paint took about 4 coats & the silver coat took only 2 coats. Paint the bottom, top, sides, everything. And when the paint is dry, I sealed it with 2 coats of clear sealer.


6.
Now, gather your glass items & E6000 glue. If you had some ceramic, or sturdy plastic items, or even possibly wooden objects you happened to find that would make great bases for the pedestal, I think it would look SUPER cool to paint the base AND the tray the same color! (Paint will not adhere well to shiny, smooth, glass objects.)


Once you've glued your pieces together, turn them right-side up & let them dry overnight before using them.


The pedestals cannot be washed in the dishwasher & MUST NOT be immersed in water.
TO CLEAN: Use a slightly damp cloth to wipe down.
These pedestals are NOT meant to have food used DIRECTLY on them. If you are going to use them for food, place a small piece of parchment paper, doilies, wax paper, etc. inside the trays first.


These pedestals, created from thrifted objects, will make a fun addition to your parties & celebrations!
(Especially with the holidays fast approaching!)
*Makes a fun gift too!*


 For other whimsical gift ideas, visit my shop on Etsy, WhiMSy love!
Rock on with yer crafty selves!

Wednesday, 21 September 2011

New Skills Festival - patchwork with with Wynn

Today it is Wynn from ZakkaArt's turn to share a tutorial, Wynn is from Singapore but very much embraces the Japanese patchwork style in her work, I was chuffed to bits when she agreed to do a patchwork tutorial for us today!


Hi everyone! I'm Wynn from zakkaArt and I'm very happy to be invited by Jo to share an easy-to-make Patchwork Lunch Shopping Bag in Japan zakka style.


This is a simple bag with a small pocket inside to put your handphone, keys or other daily stuff. It's a bag with patchwork at the bottom instead of at the top... so you might want to reconsider putting your bag on the ground next time so as not to dirty it! An interesting feature about this bag is the triangular side bottom which I wish to share with everyone.


Ok let's start to sew!


You'll need:
a. Exterior fabric 35cm x 50cm (I used linen here) with medium weight interfacing fused or sew-in.
b. Interior lining fabric 35cm x 50cm with medium weight interfacing fused or sew-in.
c. Fabric for pocket 15cm x 25cm
d. 32 squares 6cm x 6cm (use your scraps!)
e. Magnetic button
f. Webbings for handles 40cm each
g. two small pieces of batting/fleece (5cm x 5cm each)
h. (optional) lace, sew-on buttons....
**Note: All seam allowances are 1cm and not included in the measurements above.**


1. Arrange your squares with 8 squares across in 4 rows. Sew them together (as in row 4) and press the seams open (as in row 3).


2. Sew the four rows together. Press all seams open. Now you have a patchwork block.


3. Fold and iron 1cm from the top and bottom of the patchwork block. The technique of doing is to use a cardboard as what I did in the picture. As you fold using the mark, you iron at the same time. And the cardboard is reusable in all other projects!


4. Next, align the patchwork block with your exterior fabric at the centre. Top stitch (*stitching very close to the edge) the block to the fabric.


(optional step) you can add lace , pom poms, grosgrain or other embellishment to your block or exterior fabric here...


5. Fold the exterior fabric into half and pin.


6. This is the step where you want to create the triangular side botton. Fold according to the diagram in the picture so that the right sides of the fabric and patchwork are facing each other. Pin to secure.


7. Sew all the way down the two sides (note: the bottom may be thicker with layers of fabric so be careful or slower when you run your needle through it).


8. Turn inside out and there you go, you are done with the bag exterior!


9. Now to the pocket. Sew around the edge, leaving about 5cm opening.


10. Turn the pocket inside out and top stitch the edge with the opening.


11. Position the pocket at the centre of the interior lining fabric and 7cm down from the top. Top stitch the pocket in place.


12. Using the same method as in step 5, 6 and 7 to create triangular side bottoms for the interior lining fabric.


13. There you are again, done with the bag interior!


14. Next is the magnetic button. Measure 2cm down the bag interior on one side and use the backing as the template to position your button.


15. Use your seam reaper and make two holes to get the button teeth through.


16. Put the button through the batting and backing. Press the teeth down (either inwards or outwards is fine). Repeat the same to the other half of button on the other side of bag interior.


17. You are almost there! Now put the bag exterior into bag interior with right sides facing.


 18. Pin in place and stitch around leaving a 10cm opening.


19. Turn the bag inside out....


20. Top stitch the edge with the opening. Position the handles and sew 3-5 times in squares to make sure the handles and well stitched for a sturdy bag.


Ta-daa! Now you have your very own patchwork bag to go for shopping or lunch or a casual day out! ^_^
Hope you had fun making the bag! Thank you so much Jo for inviting me to join this New Skills Festival!

xoxo,
Wynn
p/s. Please make this bag for your family or loved ones.... but not to sell! Thank  you for your understanding!
pp/s. For more pictures of this patchwork lunch shopping bag, please view my flickr. If you have any doubts, feel free to email me wynn@zakkaArt.com

FREEBIES

.
Pin It button on image hover